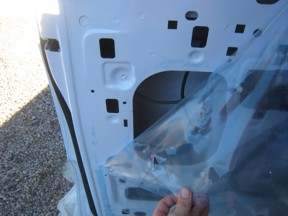
1. Remove inner door panel and lock cylinder from door.
Not sure how?
Ford Van Door Panel
|
 1 1
|
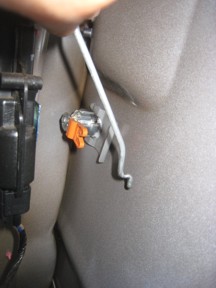
2. With the door panel off the door, remove the lock rod from the lock and latch. Take the rod out of the door.
|
 2 2
|
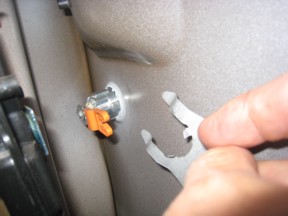
3. Remove the factory spring clip holding the lock in the door metal.
This assumes the thief didn't dislodge the spring clip. If it is not around the lock, look in the bottom of the door.
Remove the lock cylinder from the door. |
 3 3
|
4. Insert the PunchPlug™ threaded end through the lock hole so the painted plug rests in the lock cylinder depression on the outside of the door.
A piece of tape to hold it in place is helpful.
If your door was damaged by the thief, flatten the sheet metal as well as possible.
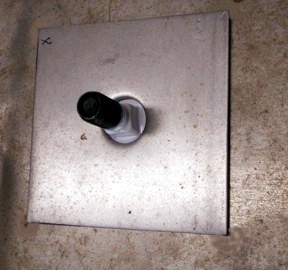
Place the flat reinforcement plate over the threaded PunchPlug™ shaft. |
 4 4
|
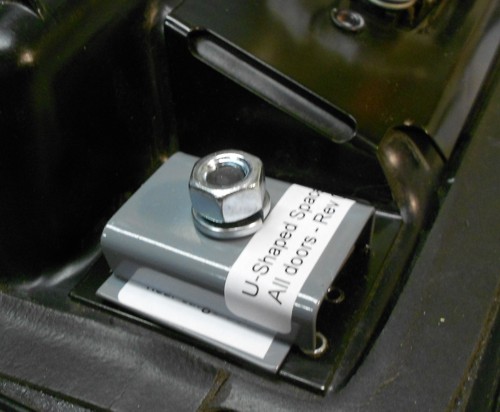
5. Place the U-Shaped spacer over the shaft so that the open side is toward the van door metal.
Put the provided lock washer and nut on the PunchPlug shaft. Tighten down the nut.
Put the door back together and this one is done! |
 5 5
|
| |
|
Rear Cargo Door Installation
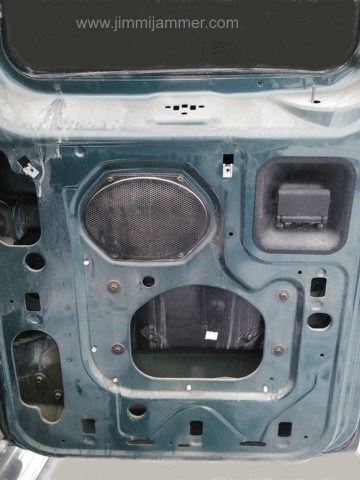
6. Remove the rear cargo door inner panel.
Not sure how? Here is a general guide.
REAR Door Panel Removal |
Rear Cargo Door Installation begins here
 6 6
|
7. Disconnect the lock rod from the lock pawl and from the top end at the latch.
Remove the rod from the door.
You could leave the rod attached at the top, just tie the bottom end loosely somewhere to prevent rattles. |
 7 7
|
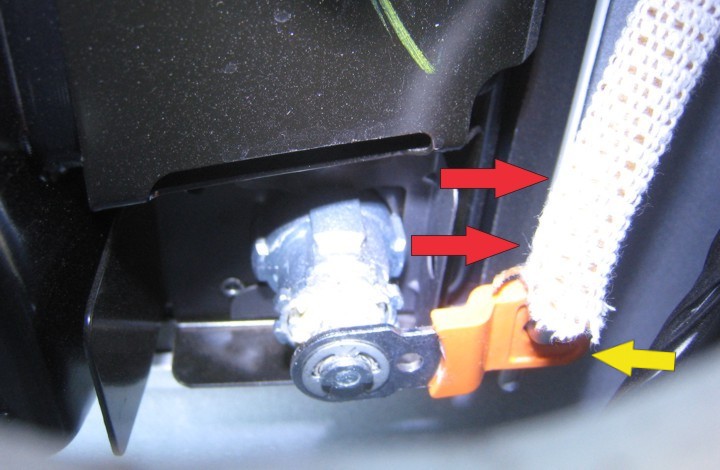
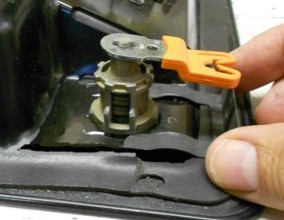
8. Slide the factory spring clip off the lock cylinder body.
Remove the lock from the license plate frame. |
 8 8
|
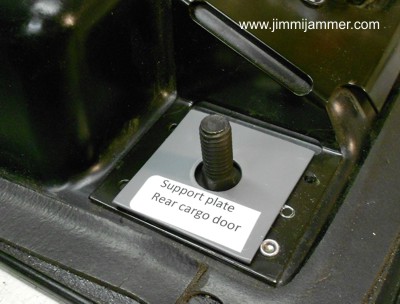
9. Put the PunchPlug™ in from the outside.. A piece of tape will help hold it in place while you finish.
Put the supplied support plate on over the threaded shaft of the PunchPlug™. |
 9 9
|
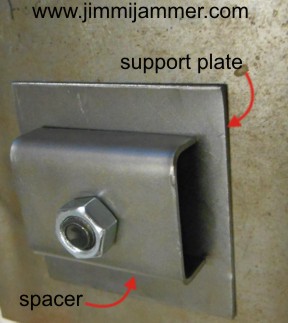
10. Place the U-shaped spacer over the threaded shaft of the PunchPlug™ with the open end toward the plate frame.
Put on the lock washer and nut. Tighten snug. |
 10 10 |
Ready to purchase? Find out Where to Buy.
Warranty and product liability disclaimer. |

All images and text copyright Redline Technical Group, Inc.
©1998-Current
Do not use without permission.
|