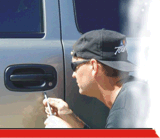
1. Remove inner door panel and outside door handle.
Not sure how? Check here >> |
Not sure how to get the door panel off? Try one of these tutorials:
Ford F150 - 1997-03
Ford F150 - 2004-2014
Ford F250/350/450 - 1999-2016
|
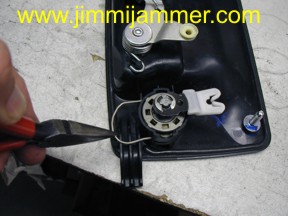
2. With the handle out of the door, remove the lock cylinder from the lock holder by removing the retaining clip. (This assumes the thief didn't break the clip out of the handle, knocking the lock into the door. If he did, skip to step 4.)
|
|
| 3. Remove the lock from the holder. |
|
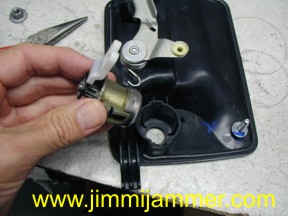
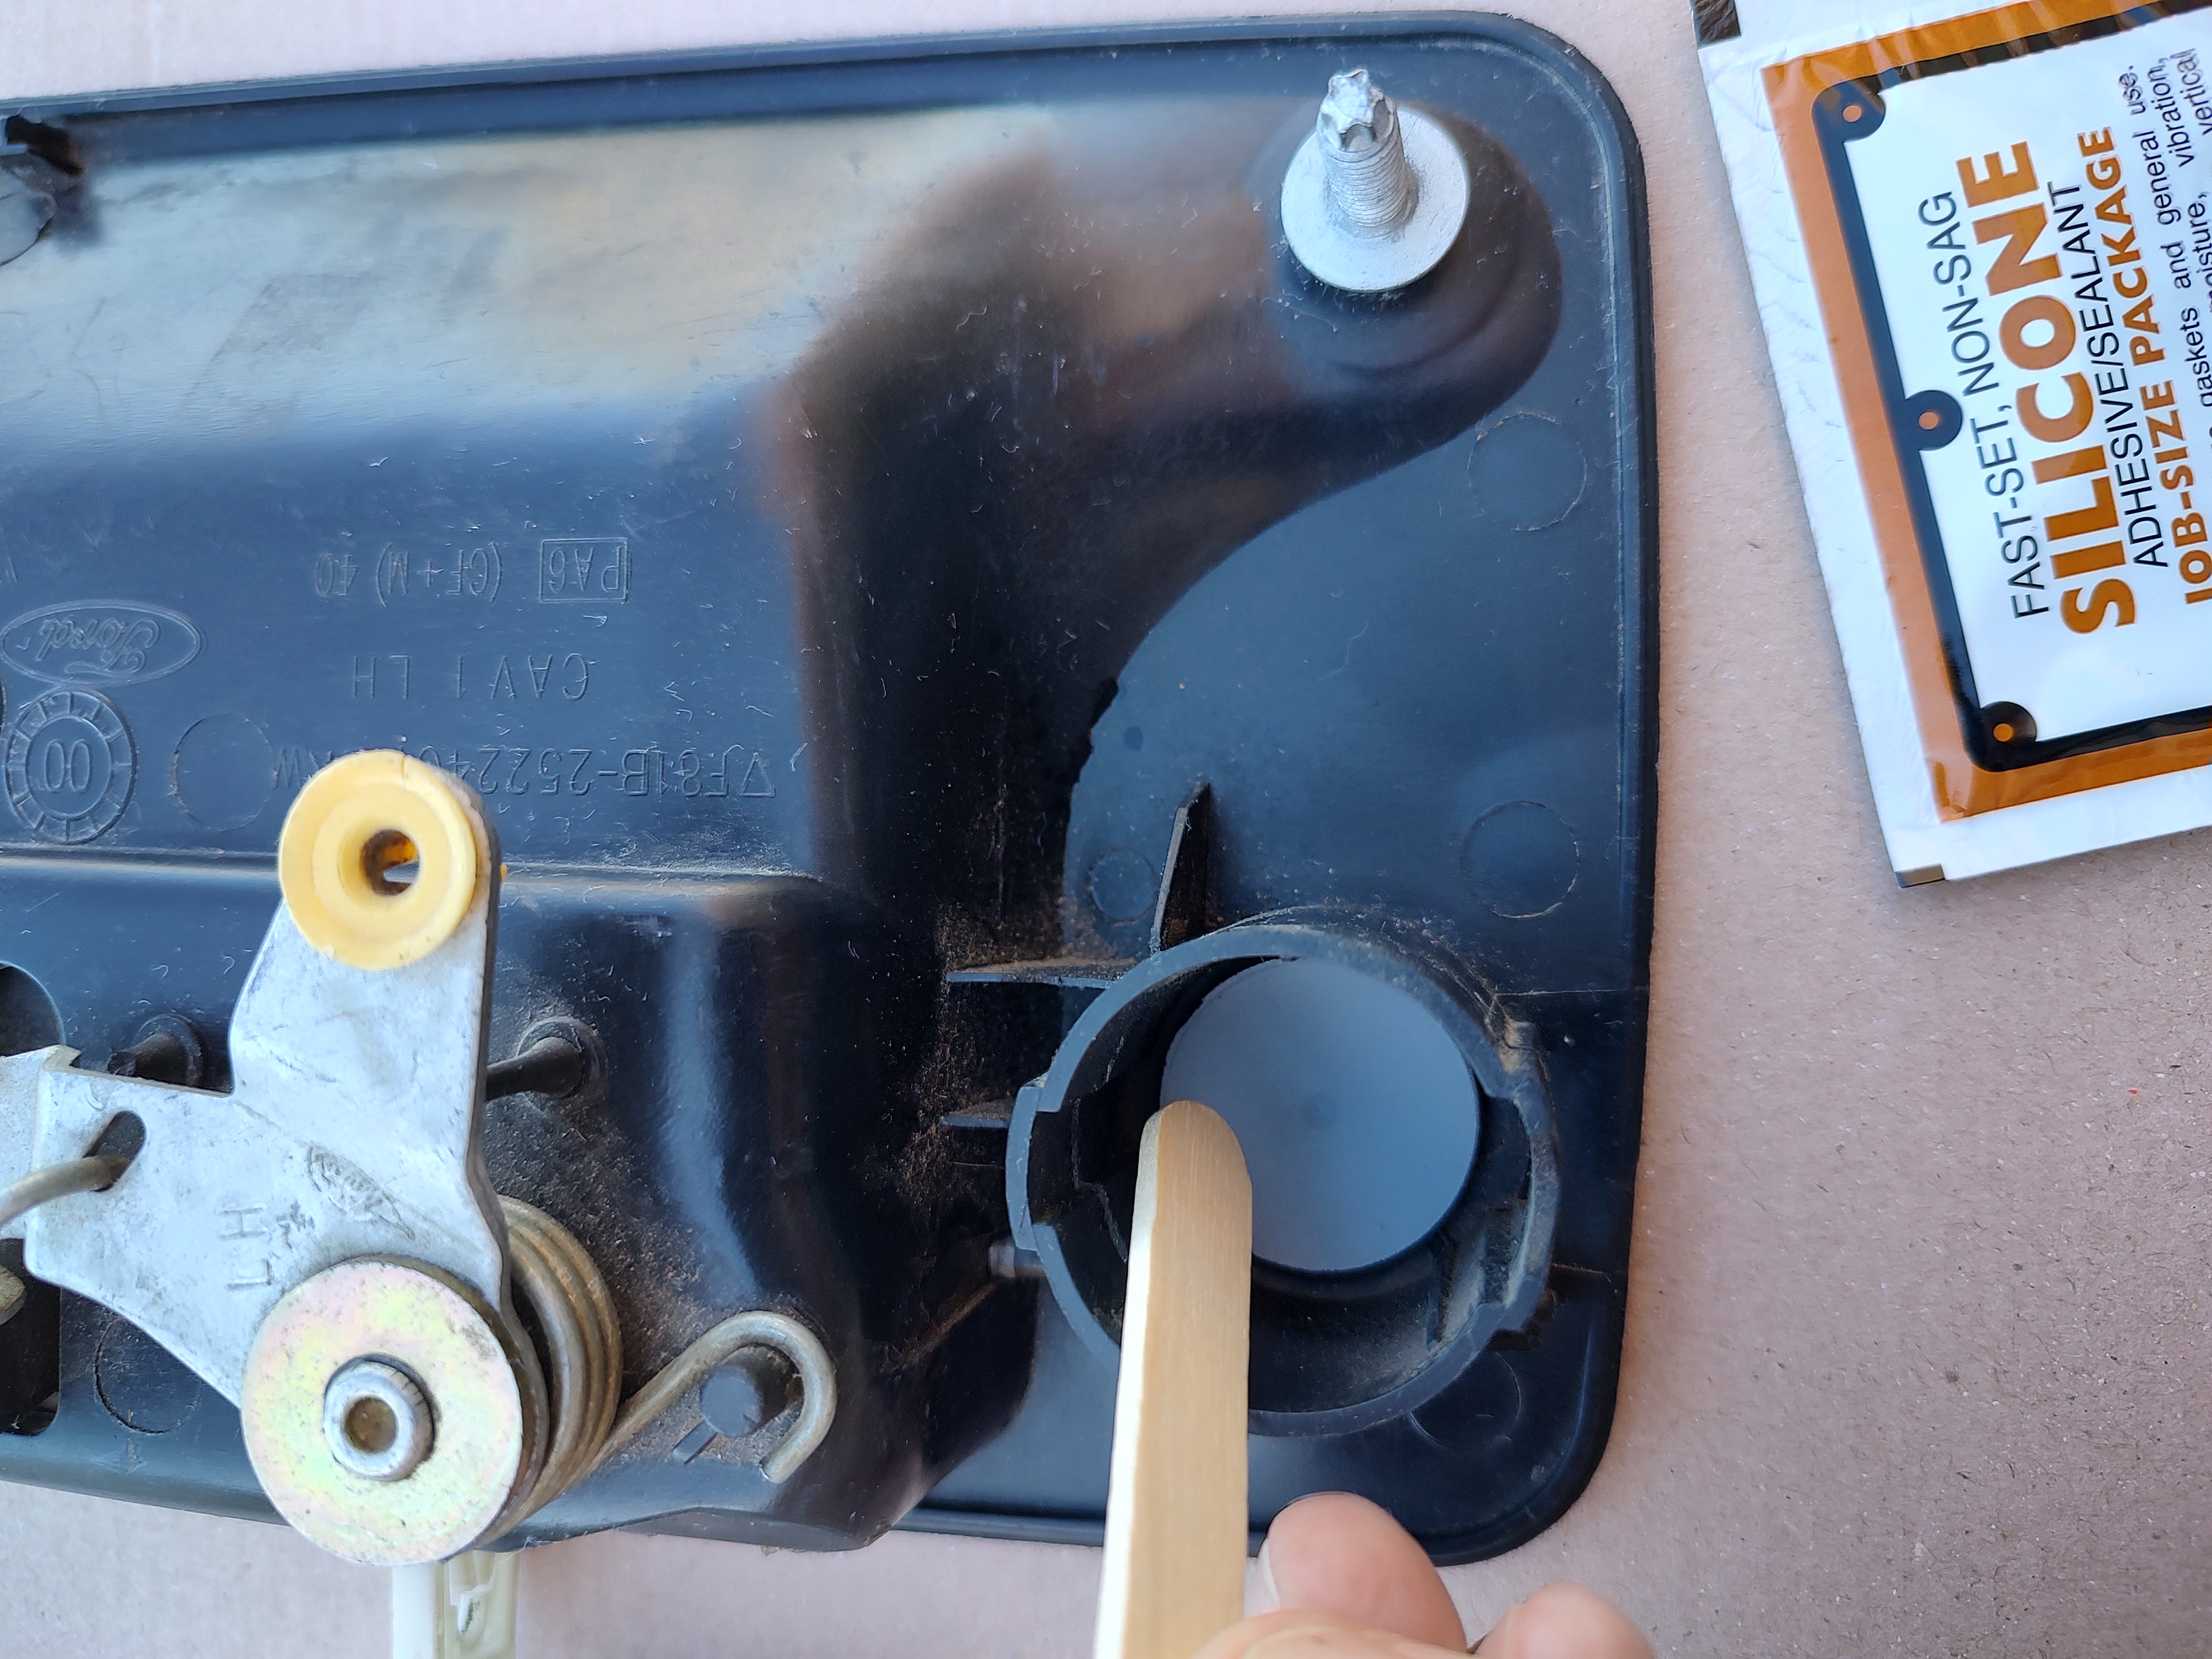
4. Use sandpaper to rough up the lock holder inside surface. Clean out any loose plastic or dirt. Spread a small amount of silicone adhesive around the inside of the plastic lock holder.
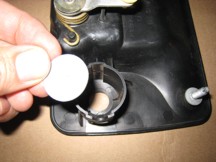
5. Insert the PunchPlug™ into the lock holder, black side down. Add a little more silicone around the edges of the disc and inside the lock holder. |
|
|
|
|
6. Turn handle over and see that dimple on PunchPlug™ is centered in lock opening for best appearance.
The dimple on the PunchPlug™ provides for the convex shape required for the disc to seat nicely in the handle.
|
|
|
7. Let the silicone set for 30 minutes before putting the handle back in the door. Full cure in 24hrs. |
|
|
8. Remove the lock rod from the door now. Do not leave it attached to the latch as it will move up or down when the door is locked or unlocked and will rattle around in the door.
Most models have a clip at the bottom end of the rod that can be unsnapped to open and remove the rod.
|
Even with the lock removed, you still need a Jimmi' Jammer® as well. Thieves have learned that they can get to the latch assembly by prying under the door handle, so the Jimmi' Jammer® needs to be there to stop them.
|