Welcome to the home of...

Tailgate Theft Prevention
Gate Keeper®
|
|---|
Gate Keeper® Installation
This tutorial covers the installation of our Gate Keeper® P/N 200420
Tools Required:
Socket set with handle
Installation/removal tool (Included)
Time Required to install:
About 10 minutes
|
PN 200420 Chevy/GMC Chevy Avalanche without body armor, 2002-06 Cadillac EXT without body armor, 2002-06 Does not fit 2007 and newer body styles |
Notice: The Gate Keeper® is NOT a lock and will not protect valuables left in the bed of the truck. The Gate Keeper® is strictly a theft deterrent to help protect your tailgate from theft. Redline Technical Group, Inc. makes no warranties, written or implied, that the Gate Keeper® will protect your vehicle or your personal property from theft or vandalism.
This kit comes with an allen security head and the tool to install or remove it. For most secure installation, use a drop of thread lock adhesive on the bolt threads before installing. |
|
|
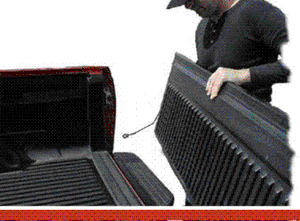
Note: The photos in this tutorial were taken using two different trucks, of different colors. Don't adjust your monitor! The tailgate pivots along the bottom edge. On the right side, there is a slot in the female portion of the gate pivot point which allows the gate to be lifted off the truck without any special tools. This is the area that the Gate Keeper® guards. 1. Open the tailgate and clean the head of the bolt on the tailgates edge, near the pivot point. |
 |
|
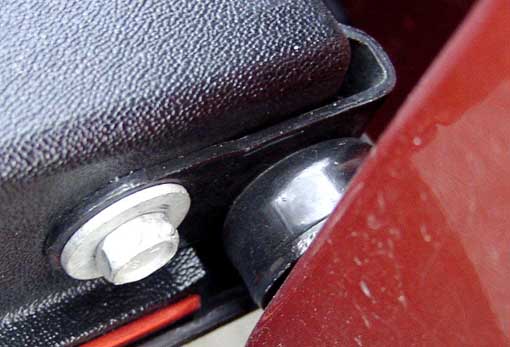
2. Remove the factory bolt and put it somewhere safe in case you ever need it again. This photo is just showing the bolt removed. Clean out the factory hole of any thread lock adhesive or dirt before proceeding.
|
 |
|
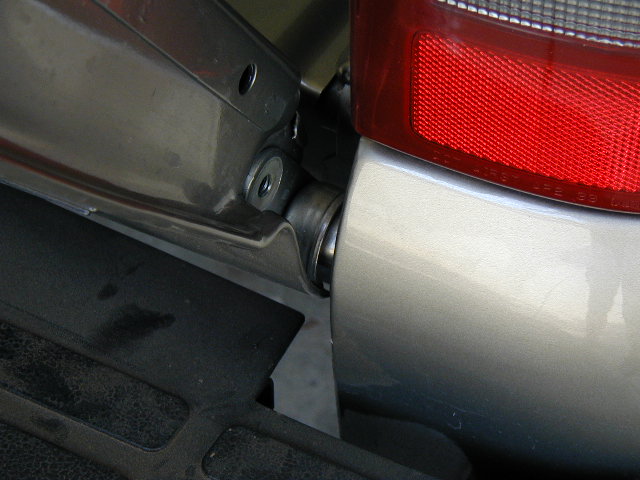
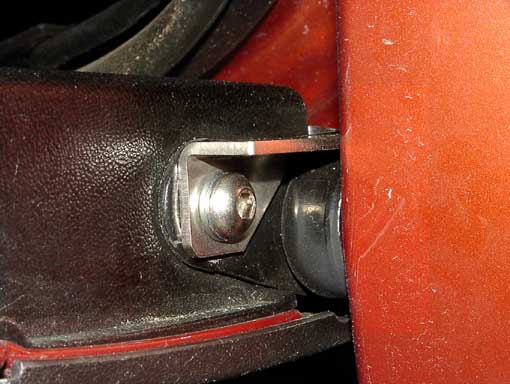
3. Next, place the curved end of the Gate Keeper®over the tailgate pivot. (Your Gate Keeper® may look different than this one as later models were changed.) Apply a drop of thread lock adhesive to the security bolt. Thread the security bolt into the factory hole. Use the washer and provided tool to tighten the bolt in place.
|
 |
|
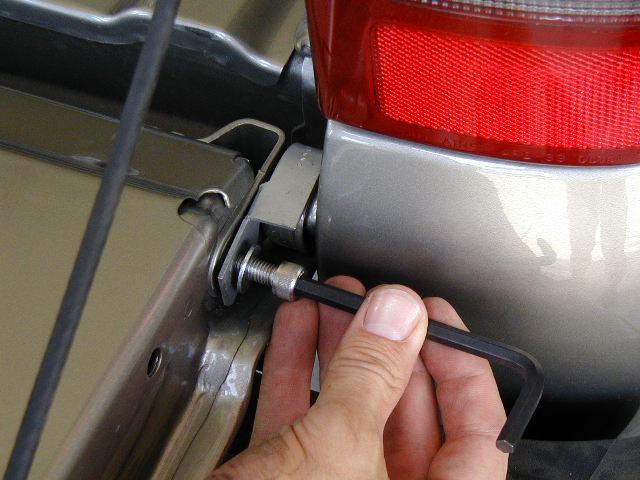
4. With the Gate Keeper® over the pivot point and the bolt tightened down, move the tailgate up and down to check for any interference. Store the installation/removal tool in a safe place, like the glove box in case you ever need to remove your tailgate. All done! |
 |
Back to installation tutorial list Ready to buy? See our dealer list or contact us. Questions? Visit our Gate Keeper® FAQs page. Interested in becoming a dealer for our products? See our dealers wanted page. |
 All photos, descriptions and images copyright Redline Technical Group, Inc. © |
| Disclaimer: Every effort is made to accurately portray the installation process for each model. However, if you are not certain of your abilities, we recommend having one of our authorized dealers perform the installation for you. |