PunchPlug™ for GM trucks, 1999-06 and 07 Classic body and 2000-06 SUVs (Tahoe, Yukon, Escalade, Suburban etc.)
This tutorial serves as a guide for installation of PunchPlug™ PN 12501/12502 which fits several GM vehicles. The process is similar for each vehicle that uses this kit style.
Installation Tutorial
1. Remove inner door panel and outside door handle.
Not sure how? Check here >> |
Not sure how to get the door panel off? Try one of these tutorials:
99-06 GM truck door panel removal
|
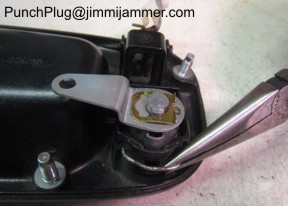
2. With the handle out of the door, remove the lock cylinder from the lock holder by removing the retaining clip. (This assumes the thief didn't break the clip out of the handle, knocking the lock into the door. If he did, skip to step 4.)
|
|
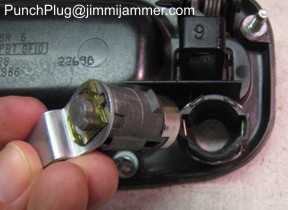
| 3. Remove the lock from the holder. |
|
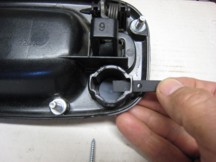
4. Insert the PunchPlug™ into the lock holder, black side down.
(At this time, if the back of your handle has been broken, see also step 9 below.) |
|
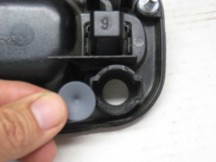
5. Insert the back brace strip through the slots where the lock retaining clip was located.
Position the hole in the strip centered in the lock holder.
(If your handle was damaged by the thief, and the back of the lock holder is broken, you won't use the back brace or screw. Just epoxy the disc in the lock holder. See step 9.)
|
|
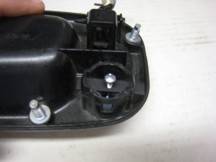
6. Thread the provided screw into the hole on the back brace until it contacts the center of the PunchPlug™ disc.
|
|
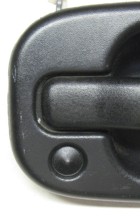
7. Turn handle over and see that dimple on PunchPlug™ is centered in lock opening for best appearance.
The dimple on the PunchPlug™ provides for the convex shape required for the disc to seat nicely in the handle. It also makes it more difficult to get a screwdriver on the center to try to force the PunchPlug™ inward.
Lastly, the dimple provides a perfect seat for the screw from the inside, to prevent the PunchPlug™ from shifting or moving around. |
|
8. Tighten down the screw in the back brace. Be careful not to over tighten as handle plastic may break.
|
No photo here
|
9. If your handle has been damaged from a theft attempt, you may need to use epoxy to repair this area of the handle, or you can simply adhere the PunchPlug™ disc in the lock hole.
Use a small amount of epoxy and apply around the lock holder where the disc seats. Keep the epoxy away from the opening to prevent seeping to the outer face of the PunchPlug™.
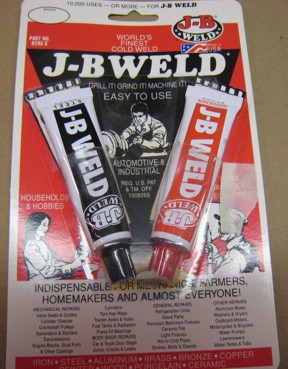
We use JBWeld 2 part epoxy, and like the quick cure formula.
Let the epoxy cure before putting the handle back in the door. |
|
10. Once you have the PunchPlug™. installed and secured, the handle mounts back in the door as normal.
|
No photo here
|
Even with the lock removed, you still need a Jimmi' Jammer™ as well.
Thieves have learned that they can get to the latch assembly by prying under the door handle, so the Jimmi' Jammer™ needs to be there to stop them.
|
|
|