Jimmi' Jammer® installation process
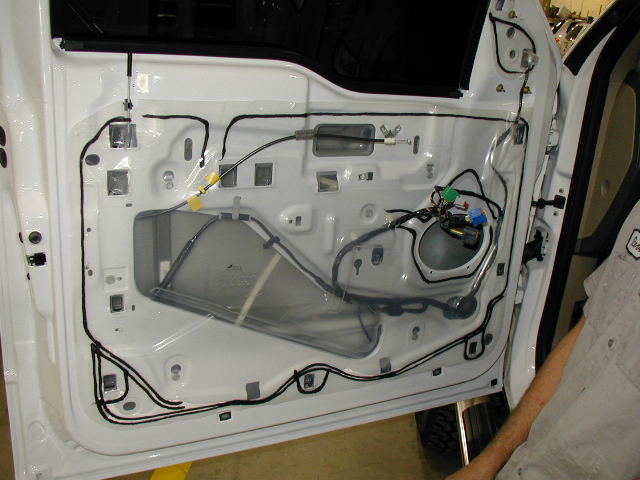
Photo 1
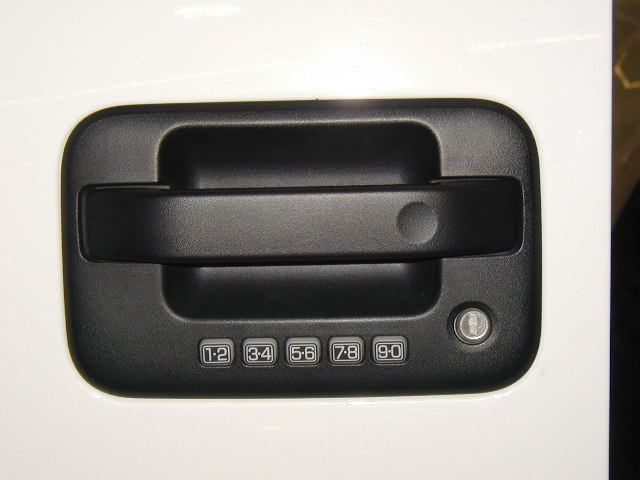
The first photo shows a drivers side door that has the keyless entry pad. This tutorial is for trucks with or without the keyless entry option. This is the drivers side or left handle. Trucks without the keyless entry will use this same tutorial.
Work carefully and take notes or make sketches to help you put the door back together properly.
Note: We now recommend removing the lock cylinder from the handle completely. This is the only way to prevent thieves from forcing something into the lock body and bending all the tabs inside the lock to gain entry. Using the PunchPlug™ with the Jimmi' Jammer® will help prevent the most popular methods of entry on your truck! Details
 1
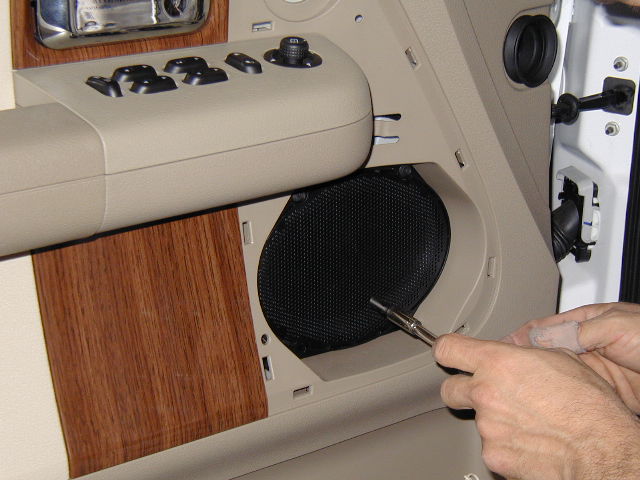
1 Photo 2
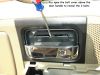
Remove the two screws holding the inner door handle shroud in place.
On some models, there may be a small plastic cover behind the door handle pull lever. Look for a seam in the plastic. Generally, these snap out but be careful. Use a small flat blade screwdriver to pry the small cover out of the handle recess. See small photo below.
 2
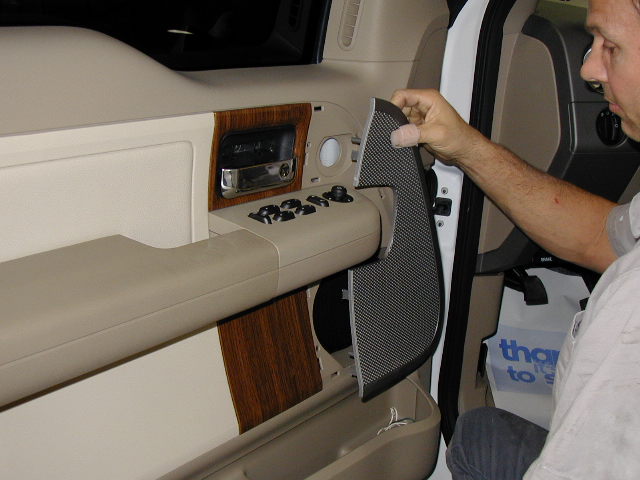
2 Photo 3
Remove the speaker grill. It should be held in with several snap clips. Pull straight out carefully to remove the grill.
Look for a door panel holding screw in the upper left area behind the grill.
 3
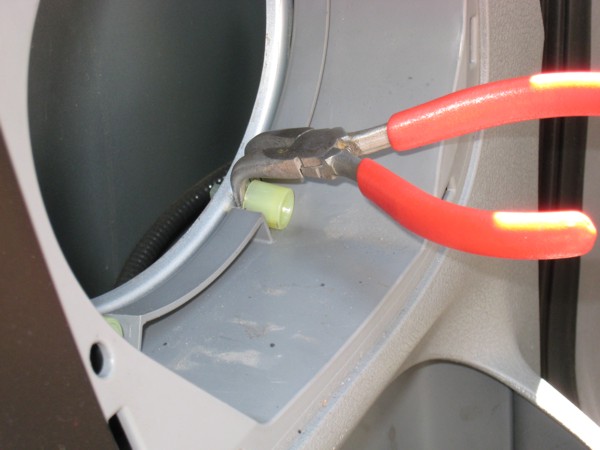
3 Photo 4a and 4b (This step not necessary on 2009 and newer trucks) See a video for 2009 - 14 trucks here.
Remove the four screws holding the speaker in place. Pull out the speaker and disconnect the wires.
Behind the speaker are four extensions that the screws went into. The bottom two will need to be removed to get the door panel past them as you lift the panel off later. Carefully pry the bottom two extensions out. These are relatively brittle, so work carefully. Photo 4b shows use of a curve nosed pliers to pull the spacer off.
There is also a door panel holding screw behind the speaker. Remove it now.
Now is also a good time to remove the two screws along the bottom edge of the door panel. (Not shown.)
 4a
4a
 4b
4b
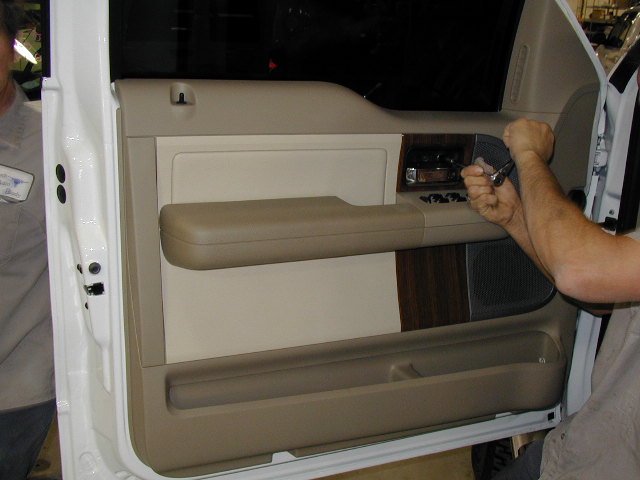
Photo 5
Carefully pry the switch panel up. It is held in place with several snap clips. Work around the sides gently prying upward until the panel comes off.
This is a good time to roll the window down, before disconnecting the switch pad. This helps when removing the door panel.
(Later, after removing the door panel, you will need to reconnect the switches to roll the window back up in order to gain access to the backside of the outer door handle.)
 5
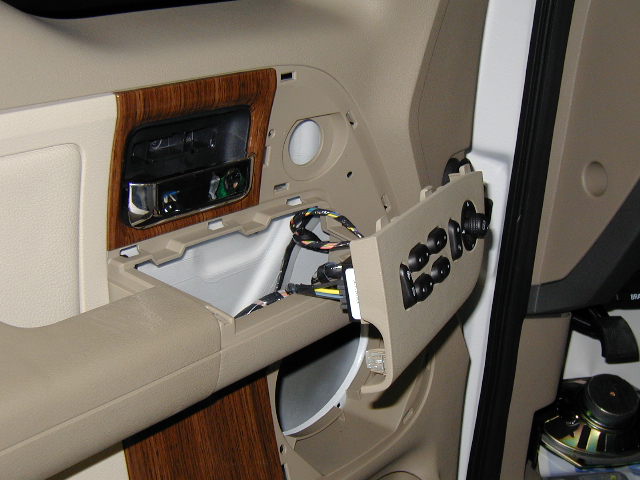
5 Photo 6
Another door panel holding screw is hidden inside the cavity. Remove it now. Disconnect the switch pad if not already done.
You are now ready to lift the panel off the door. Slide the panel upward until it is loose from the door. (Not shown.)
Next, disconnect the cable to the inside door handle. Note how it is attached so you can put it back on correctly later. (Not shown.)
 6
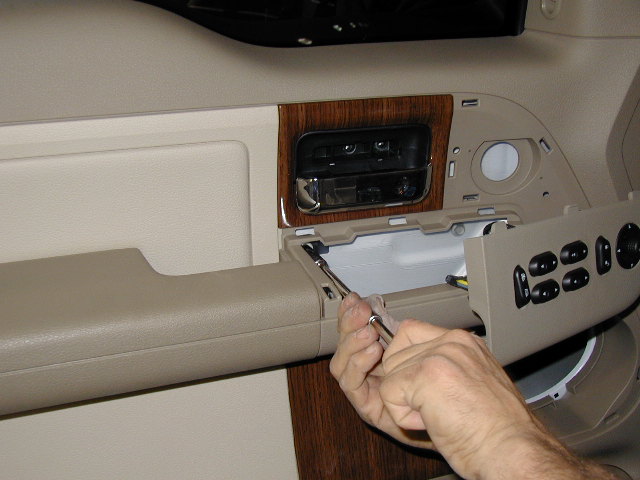
6 Photo 7
With the door panel off the door, reconnect the window switch to roll the window back up if it was put down earlier. You can leave the switches connected since the window may have to come down to put the door panel back on.
Next, carefully peel back the plastic splash guard enough so you can reach into the door cavity through the large opening shown. Start in one spot and peel back slowly, trying to leave the adhesive on the door.
 7
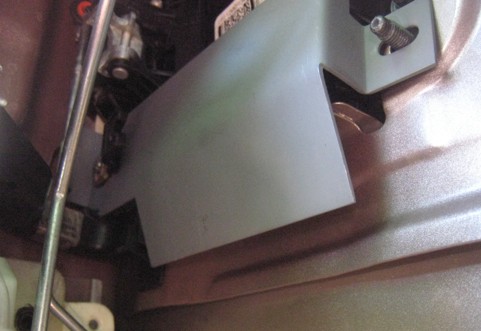
7 Photo 8
Photo 8 shows the backside of the drivers door handle from inside the door.
The yellow circle surrounds the end of the lock pawl. The end of the lock rod is also inside the circle. Remove the lock rod from the lock pawl at this end.
A trick to remove the rod from the pawl is to use a stubby screwdriver with a shaft diameter a little larger than the lock rod diameter. Push the shaft of the screwdriver into the open end of the lock pawl until it touches the lock rod. Wrap your finger around the lock rod and pull the rod toward the open end of the lock pawl. This will release the rod from the pawl.
Note: We now recommend removing the lock cylinder from the handle completely. This is the only way to prevent thieves from forcing something into the lock body and bending all the tabs inside the lock to gain entry. Using the PunchPlug™ with the Jimmi' Jammer® will help prevent the most popular methods of entry on your truck! Details
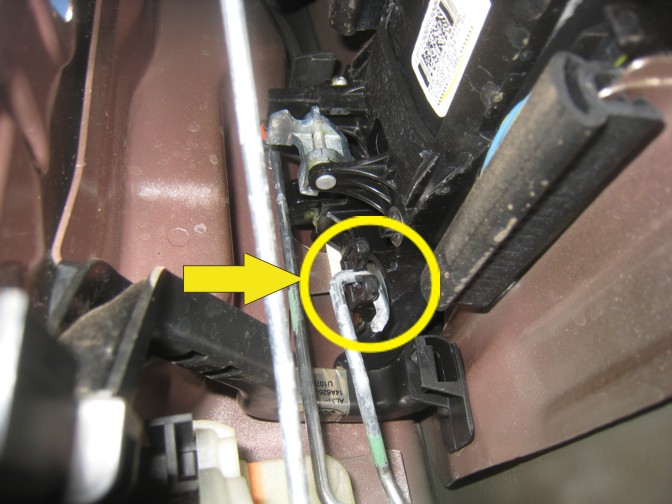 8
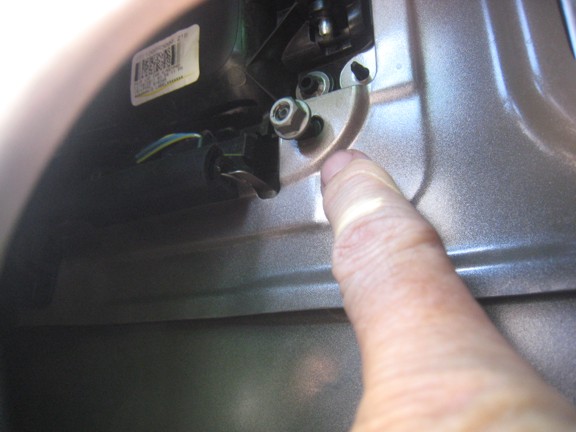
8 Photo 9
Inside the door, remove the nut on the lower handle stud on the opposite end of the handle from the lock cylinder, shown here near the center of photo 9.
 9
9
Photo 10
Photo 10 shows the lock pawl with the lock rod disconnected from it. Use the key in the lock to turn the lock pawl so the open end points downward as shown.
This will help ease placement of the plate.
 10
10
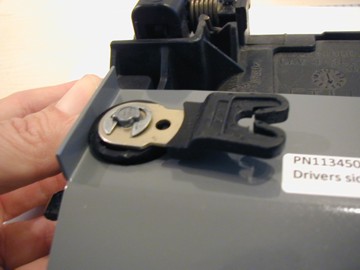
Photo 11
The plate should have a screw in the end near the large hole. Leave the screw in the plate while the plate is installed as it is difficult to put it in later.
Put the plate in place by first guiding the lock pawl through the large hole in the plate. You may need to move the lock pawl with the key to get the plate on properly. Once the plate is in place over the lock assembly, swing the other end up and over the mounting stud.
Photo 11 shows the plate in place, with the mounting slot over the mounting stud. The lock pawl is through the plate at the far end.
Photo 11a shows how the plate fits on the back of the lock when properly seated.
You can now put the nut back on the handle mounting stud.
 11
11
 11a
11a
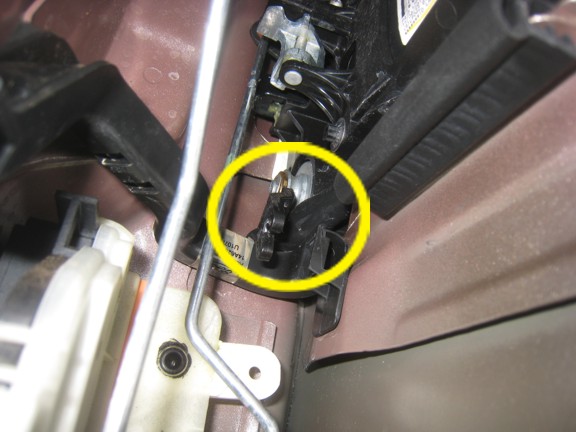
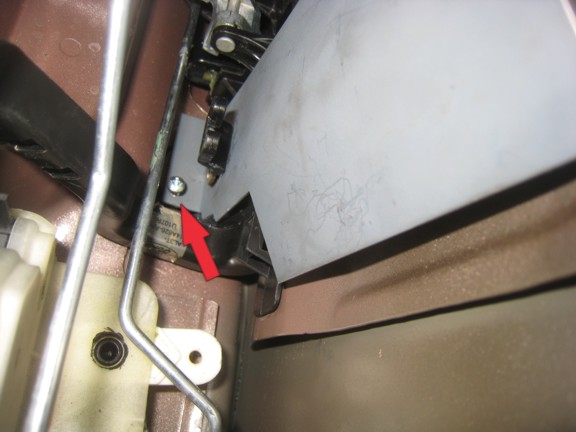
Photo 12
The arrow in Photo 12 points to the door jamb set screw. With the plate and handle mounting nut already tightened in place, screw the set screw in until it makes good contact with the door jamb metal. Stop short of the screw tip piercing the door jamb metal, but if it does, just file the point off from the outside door jamb.
Recheck that the lock pawl moves freely past the screw head and doesn't have any interference with the plate. (Minor rubbing of the rod against the plate is not a problem, just put a dab of grease where the rod touches the plate if needed.)
If rod seems to rub too much, the lock pawl can be bent slightly away from the plate to get a little room. Hold the lock pawl on the lock with a tool or your finger before trying to bend the pawl so the clip doesn't pop off!
 12
12 You are now ready to put the door back together. Work in reverse order to put things back in place.: Make sure you don't have any leftover parts
Test the function of your windows, locks and latch before doing the other door.
Now you can place the window warning label in the lower corner of the window. Clean and dry the window before putting the sticker on. Place carefully since the adhesive on the stickers is very strong.
All done? Check out our Gate Keeper® to prevent tailgate theft!
Also, protect your engine compartment with our Hood Latch Guard!
NOTE: If your truck does not have a lock on the passenger door, or rear doors, you still need a plate on these doors. Without showing how it's done, it is possible to get at other rods inside the door even if no lock is in the handle. Be sure to install a Jimmi' Jammer® on each door that has an outside handle!

Having trouble? Our tech support team is here to help
Call 480-452-6894
If we don't answer, leave a message and we'll get back to you asap!